Aliexpress WW
Aliexpress WW

A Step-by-Step Guide to Editing Photos? Remember To Keep Your Originals!

Editing photos? Remember to keep your originals!

Even if you're not a professional photographer, you probably have some photos that are important to you: weddings, graduations, family vacations, old friends, etc. Hopefully, you're already backing up your important digital photos along with your other files, either with an external hard drive or a cloud backup service.
But even if you're keeping your photos safe, there is still a risk of damaging them when you edit them. For example, let's say you decide to convert a photo to black and white to give it an artistic touch. If you change your mind later on, you won't be able to convert it back to color because the color has already been removed from the image.
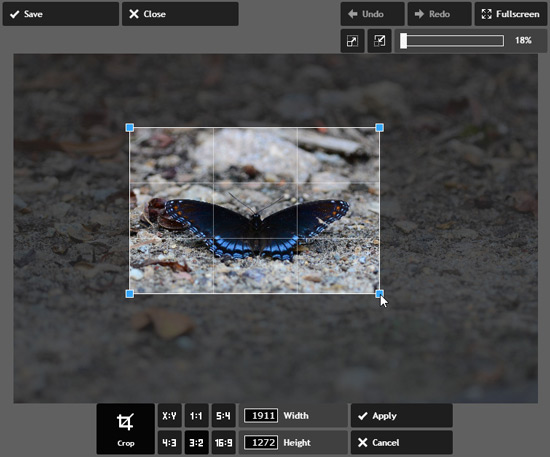
There are many other kinds of edits that are irreversible once you've saved the image because they remove information from the image that is difficult or impossible to get back. These include cropping, resizing, and many types of filters. Other adjustments, like boosting contrast, may be somewhat reversible, but the image will usually lose some quality.
Screenshot of Pixlr
Luckily, there is a solution! All you have to do is keep an original, unedited copy of any photos you edit. Then, no matter what changes you make, you can always go back to the original if you change your mind.
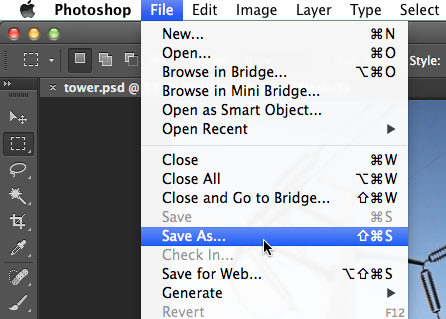
Keeping your originals is easy. Whenever you edit a photo, use Save As to save the edited copy with a different name. If the original file name is DSC_0314.jpg, you could name the new file something like DSC_0314_blackandwhite.jpg. The one thing you don't want to do is simply click Save, as this will overwrite your original image.
Screenshot of Adobe Photoshop
Alternatively, you can duplicate the photo before you start editing it. To duplicate a file in Windows, just click and drag the file while holding the Ctrl key. On a Mac, right-click the file and select Duplicate. Any method that creates a copy of the file should work, so use whichever method you prefer.
There's another benefit to keeping your originals: It gives you more freedom to experiment with photos because you no longer have to worry about whether you'll be able to undo your changes. It's fun to get creative, and you can actually learn a lot about photo editing by simply trying things you've never tried before.
The main disadvantage of keeping your originals is that it creates more files, which means your photos will take up a bit more space on your hard drive, and it may take a bit more time to manage them. If you're editing lots of photos, you may even want to use a photo management application such as Lightroom or Windows Photo Gallery. These applications will automatically keep your originals for you, so you don't have to worry about managing lots of extra files. They also have other features like tagging to help keep your photos organized

Comments

Popular posts from this blog

The Advanced Guide to Colours In Graphic Design

The power of color Color plays a vital role in  design  and  everyday life . It can draw your eye to an image. Sometimes it can trigger an emotional response. It can even communicate something important without using words at all. So how do we know which colors look good together and which ones don't? The answer is simple:  Color theory . Artists and designers have followed  color theory  for centuries, but anyone can learn more about it. It can help you feel confident in many different situations, whether it's  choosing colors for a design  or  putting together the perfect outfit . With a little insight, you'll be looking at color in a whole new way. Color basics Let's start at the beginning with a refresher on the basics. Remember learning about  primary and secondary colors  in school? Then you already have some knowledge of color theory. Secondary colors  are created by combining two  primary colors...

The Ultimate Cheat Sheet On Making Basic Adjustments In Image Editting

Introduction Image editing is all about adjusting your images to make them look better. We're going to talk about some of the most  basic image adjustments , along with some common problems to watch out for when making these changes. The adjustments we'll cover in this lesson include: Cropping : If you want to remove parts of an image, you can  crop  it. You can think of cropping as using a pair of scissors to  cut out  the parts you no longer want. Resizing : If you want to make an image smaller or larger, you can  resize  it. However, keep in mind that making an image larger than its original size generally does not look good. Rotating : If you want to change the  orientation  of an image, you can  rotate  it to the left or right. Optional : If you'd like to follow along, you can download some or all of our  example images . Just click any of the images below to open a full-sized version. Then right-click the full-si...

The Ultimate Glossary of Terms About Typography In Graphic Design

What is typography? Typography is everywhere we look. It's in the books we read, on the websites we visit, even in everyday life—on street signs, bumper stickers, and product packaging. But what exactly is typography? Simply put, typography is the style or appearance of text . It can also refer to the art of working with text—something you probably do all the time if you create documents or other projects for work, school, or yourself. Common types of fonts Typography can be an intimidating subject, but it doesn't have to be. You only need to know a little to make a big difference in the stuff you do every day. So let's get started. First, some common types of fonts  and what you need to know about them. Serif fonts Serif fonts have little strokes called  serifs attached to the main part of the letter. Because of their classic look, they're a good choice for more  traditional projects . They're also common in print publications, like magazines an...